


To learn how to also make Lowrider button front, see the previous blog post here.
Adding ruffles to any pattern is simple. You simply measure the length you want, multiply it by 1.5x and then gather and sew on top of your finished garment (after finishing the edges of course) but there is a cleaner way to do and I’ll show you how.
It’s best to have a french curve for this tutorial but you can eyeball it if you don’t have one.
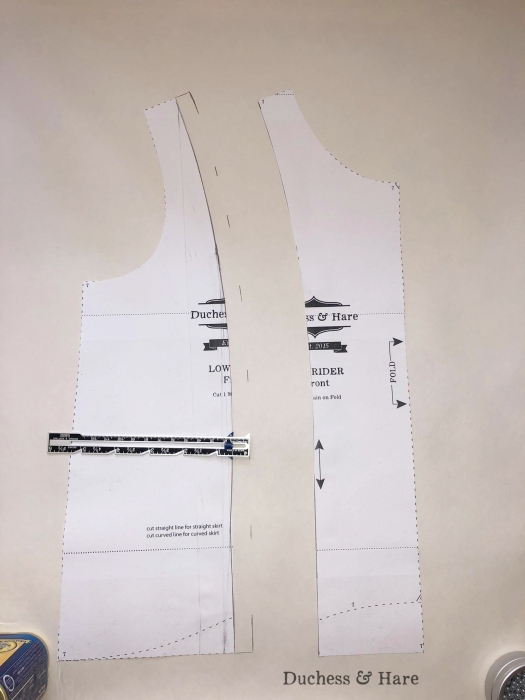
First up, you’ll want to print out your lowrider (here) bodice front and back.
Measure and mark the shoulder’s halfway point. Then measure and mark the bodice bottom 5/8″ from the side. You could do halfway, but blending your curve will be easier if you mark just a bit over halfway. Don’t worry about the math too much, you can guesstimate.

Measure down 1/2″ from each mark and make sure they’re square. This will ensure that there is no point when they’re sewn together.

Using your curve, blend the marks into a smooth curve. This will probably require shifting the curve a few times to get it right. I start with the top and bottom and then blend the line between.


Cut your pattern apart along the new line. Copy this line onto your back piece by laying it over the top. Line up the shoulder and just trace the new curve onto the back. Then cut the back piece apart too.
Now that you have your new pieces, you’ll need to add seam allowance. I’m adding 1/2″ because that’s how I roll, but you can add as much or little as you like. Just be sure you remember what it is or mark it on the pattern piece.
Tape or paste the pattern piece onto a new piece of paper and use a seam gauge to mark out the seam allowance along the curve.
Then blend the lines together to mark the new pattern piece. Repeat for the other 3 pieces.

Cut out your new pattern pieces!
To determine the length of your ruffle, measure the curved edge. For a regular ruffle, multiply that measurement by 1.5 to get the length. For a fuller ruffle, multiply by 2. If you don’t want a shoulder seam in the ruffle, you’ll need to double this measurement.
You can make this ruffle as wide as you like. I like mine about 1″ – 2″ depending on size. bigger sizes will need a wider ruffle. You can sketch in the ruffle on the pattern piece to determine how wide you want it. Measure that width and then add in your seam allowance for both the hem and the piecing.
You can use your new pattern pieces for colorblocking, adding ruffles, or adding piping, or my favorite, adding a lace overlay. Learning how to cut pattern pieces really opens up a whole world of pattern hacking!

Thank you, great tutorial!
LikeLike